Compost Rotation:
It is important to rotate your compost pile to get adequate airflow, moisture and temperature control. Its really pretty basic and just takes some time and sweat!
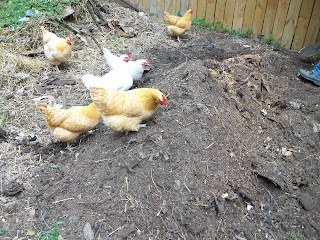
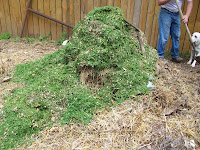
We turn our pile every 6-10 weeks and have 4 "open air rotation stations". The first station (as you can see in the first picture below) is the newest pile that has mostly green matter. The second pile was turned 6-10 weeks prior and the third pile was turned 6-10 weeks prior to that. The fourth pile (which is taken to the garden pretty quickly) is the screened out organic matter that is headed to the plants!(There are alot of different ways to set up and to work your compost pile, but this is the way we have figured out works best for us and our area...get creative and figure out what works best for you!)
Start off by checking the temperature of the center of your pile to make sure it is getting some good moisture and heat and is ready to be turned.
 Begin turning the pile that has been composting the longest and turn it by just repiling it into another area. This pile has been "working" all winter and is looking really good!
The chickens sure get excitted when we are working back in the compost area because they know there will be some easy pickins of alot of bugs!!
Once that pile is moved then you can turn the newer piles into those "stations".
You want to make sure you have a good ratio of "brown to green matter" ("dry brown stuff" like leaves, hay and dirt...and "moist green stuff" like grass clippings, fresh leaves, kitchen scraps, etc)
Just keep piling it up! Bryan set up a barrier in between the 2 piles so the chickens dont scatter the two piles together.
Give it some moisture (just a light misting...not too much!)... This is the kids favorite part!
Heres Bryan and Sarge takin a look at the oldest rotation which looks really good and will be ready for screening here in a couple of weeks!
The newer rotation turned out to be pretty good and will make for some GREAT soil for the garden in a couple of months!
Its been a lot of work to get these piles rotated but it sure is worth it and very excitting to see all the excellent quality organic matter that we can add to our garden! This is FREE fertilizer and it is the very best thing you can do for your garden! We dont have any special compost structures or equipment, just some time and work! Give composting a try...besides you just be throwing the stuff away anyway :)
Happy Composting!


No comments:
Post a Comment