
I have gone through so many different bread recipes to try and find the best fit for me...let me tell ya, its quite frustrating to spend hours investing in a recipe that you just cant EVER get right! I have 2 main dough recipes that I have taped to the back of my cabinet door above my stove that are my "go to" dough recipes. One recipe is a quick and easy, very basic recipe and it is what I use for pizzas and stuffed doughs. Then there is the breads and rolls recipe...and here it is! I have broken down the recipe to make rolls to fill 1 pie plate...this is just about how many I would need for my family for dinner, and a few extra for lunch the next day.
Pie Plate Rolls:
- 1/4 cup warm water & 1/4 cup warm milk (or just 1/2 cup of warm water)
- 1 teaspoon yeast
- 3 Tablespoons sugar (or honey)
- 1 egg
- 3 Tablespoons butter (melted)
- 1/2 teaspoon salt
- 2 cups whole wheat flour (freshly ground wheat will make for the most overwhelmingly delicious rolls!)
- sometimes I also toss in herbs or ground flax but not all the time.

(these pictures are for 20 large rolls and I did 4 times the recipe and used a large pan 9x13 pan...cause my dad was coming over, hahaha, and a lot of other people)...and about 2 and a half hours from start to finish.

 First you want to combine the warm water, sugar, and yeast and let it activate by letting it set for a few minutes.
 Attach your paddle to your mixer (not the dough hook...we will use that later). The paddle will help mix up the gluten much faster! Add in 3/4 of your total flour (for 1 batch you will add 1 1/2 cups of flour for 4 batches together you will add 6 cups) and save the rest for the next step. Set your mixer on speed 4 and mix for 5 minutes.
 You can see how clumpy the mixture is as you start to mix it up...then as the gluten activates it is more stretchy!
 Now attach your dough hook and add the remaining flour. Kneed with the dough hook on speed 2 for about 5 minutes.
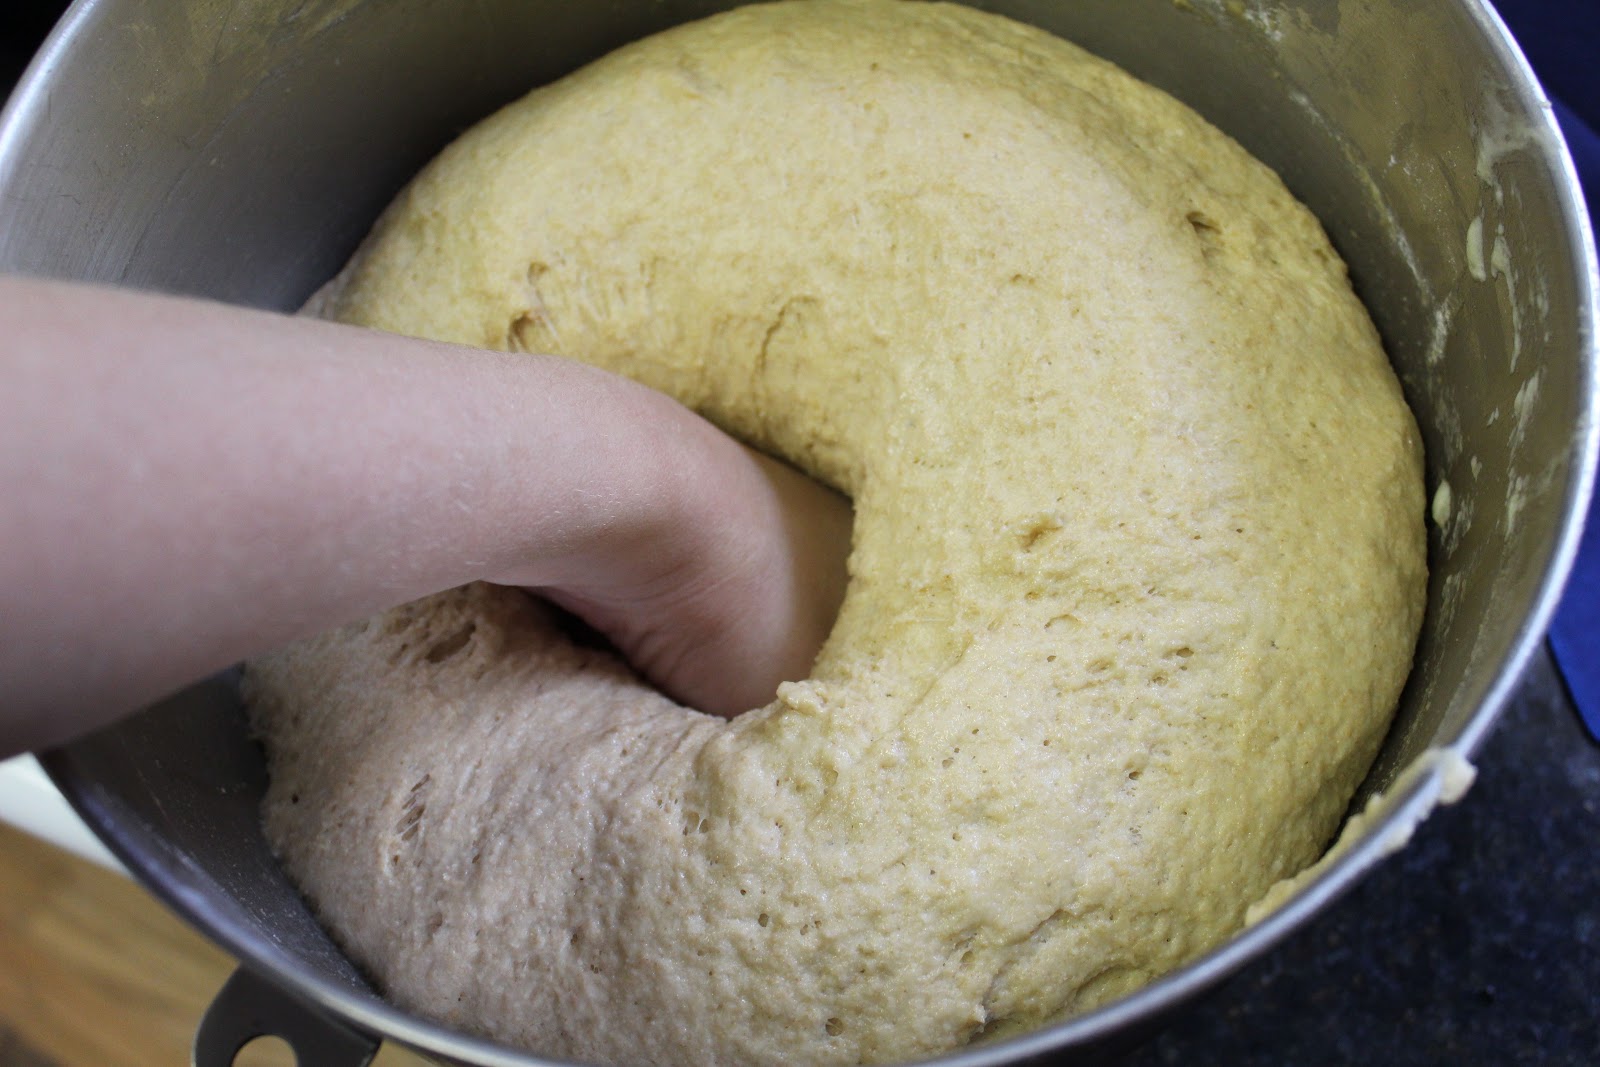
You will see how the dough forms a slightly sticky ball and this is perfect!!

When you are working with fresh ground wheat it will react differently than bleached white flour you buy in the store. You want to keep it as moist as possible and avoid adding any extra flour! When I first started grinding my wheat at home and trying to bake with it I would get extremely frustrated because all my bread would turn out as heavy bricks! I have now found out it is due to adding too much flour! To prevent sticking, you want to add a small bit of warm water or oil to your hands instead of flour.

 Now you have a beautiful ball of moist and sticky dough. Cover the dough with a damp towel and place it in your oven along with a few cups of steaming water. The steaming water helps maintain moisture as well as a warm temperature. This is another trick I have learned along my journey to fluffy light bread!
Let your dough raise for about 45 minutes.
Once your dough has doubled in size you want to punch it down and begin forming your rolls!
Now to the fun part! Well, actually everything about making homemade rolls is FUN, but this is where all the kids at heart get excited because you get to dig in and get your hands messy!! :)
This is how my mama taught me to make rolls...dont pull out a clump of dough and roll it into a ball.
You want to take some of the dough and pinch off your roll to keep the top nice and perfect as well as not deflating your dough!
Big Ball of dough ...

Get ready...

Slide your index finger and thumb around in the size you want...

Squeeze the roll out...

Pinch it off...

Toss it into the pan!

Once all your rolls are even and placed into the pan (which you may need to add to or take away from a few and reshape them...unless you are an amazing guesstimator and can make 20 perfectly sized rolls the first time!) Top your pan with a damp towel and place back into your warmed oven with the hot steamy water.

Let your rolls raise for about 45 minutes...until they are doubled in size.


 Preheat your oven and bake at 350 degrees for 15-20 minutes or until the tops of your rolls are golden brown and sound hollow... Reach in the oven carefully and tap the top of your rolls with your finger nail and it should sound hollow. Take them out of the oven and let the river of butter flow!!
  I made a big pot of chili that night to go with the rolls! Chili that is cooked on low all day is SO delicious...plus its is something I can make first thing in the morning and put it in a pot on the wood stove (or in a crock pot) while I get the house all clean. Then Im not making a mess of my kitchen right before company is coming over.
YUMMY! Mmmmm, I can smell them from here! ;)
ReplyDeleteMmm... bread.
ReplyDeleteWhere does the egg come in at?
ReplyDeleteWhere does the egg and butter come in?
ReplyDelete